Choosing the Right Approach for Each Damage Size
Drywall damage falls into three categories, and each one calls for a different technique. Matching your method to the damage from the start saves time and avoids rework.
- Tiny holes (nail holes, picture hooks, small dents): Spackling compound applied with a putty knife, sanded smooth once dry - typically a 30-minute repair start to finish.
- Small to medium holes (up to about 3 inches): A self-adhesive fiberglass mesh patch backed with joint compound, applied in two or three thin coats.
- Large holes (3 inches and up): A cut piece of drywall held in place by backing boards screwed into the existing wall, then finished with mesh tape and joint compound.
Before you start any repair, check whether the damaged area has any electrical wiring, plumbing, or insulation behind it. If you are unsure, use a stud finder with AC detection or consult a professional before cutting into the wall. Working around live wiring without proper training is dangerous and should always be left to a licensed electrician.
What you will need
Step-by-Step Drywall Repair Instructions
Follow the steps below in order, skipping to the step that matches your damage type. For larger repairs, start from Step 1.
Clean and Prepare the Damaged Area
Remove any loose paper facing, crumbled gypsum, or protruding nails or screws around the hole. Use a utility knife to trim ragged edges so you have a clean, stable border. For nail holes, simply press in any raised edges with your fingertip or a putty knife handle.
Fill Nail Holes and Small Dents with Spackling
Scoop a small amount of lightweight spackling compound onto your putty knife. Press it firmly into the hole with a single smooth stroke, then drag the knife flat across the surface to remove the excess. The compound will dry slightly recessed; apply a second thin coat once the first is dry if needed.
Once fully dry, sand flush with 120-grit sandpaper, then smooth with 220-grit. Wipe clean and the area is ready for primer and paint. Stop here if your damage was limited to nail holes or small dents.
Apply a Mesh Patch for Medium Holes
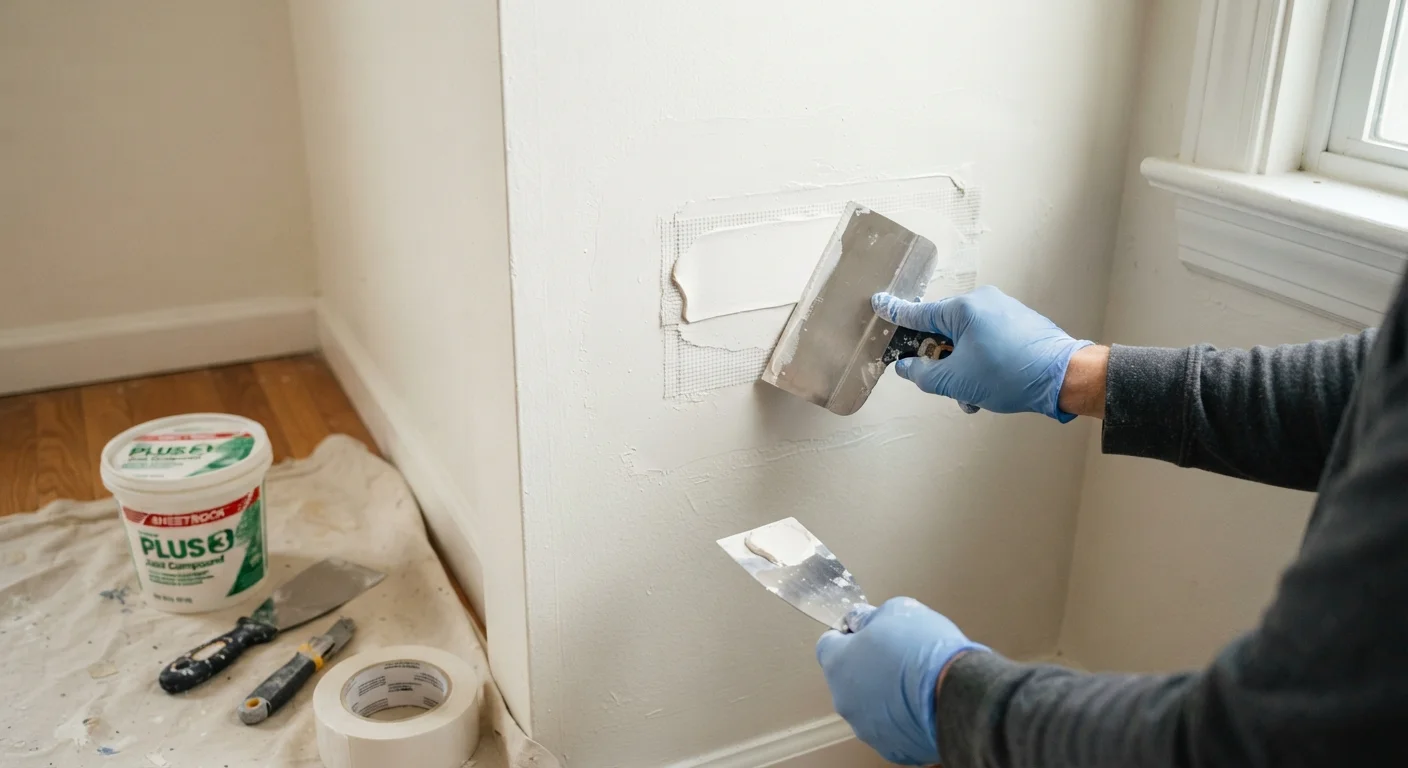
Peel the backing off a self-adhesive fiberglass mesh patch and center it squarely over the hole, pressing firmly to adhere. Using a 6-inch drywall knife, apply a thin coat of all-purpose joint compound over the mesh, working it into the openings of the mesh and spreading it about 2 inches beyond the patch edges in all directions.
Allow the first coat to dry completely (typically several hours, or overnight in humid conditions), then apply a second wider coat, feathering the edges. A third skim coat is often worthwhile for a smooth finish. Sand between coats lightly if ridges form. Stop here if your damage was 3 inches or smaller.
Install Backing Boards for Large Holes
For holes larger than about 3 inches, you need internal support. Cut two strips of scrap wood or thin plywood slightly longer than the height of the hole. Slide each strip behind the wall opening on opposite sides, holding it tight against the back of the drywall. Drive drywall screws through the existing wall face and into the backing boards to anchor them - the boards should bridge the hole and grip the surrounding intact drywall firmly.
Cut and Screw in the Drywall Patch
Measure the hole carefully and cut a piece of scrap drywall to fit snugly inside it. Drive drywall screws through the patch piece and into the backing boards behind - two screws per board is typically sufficient. The patch surface should sit flush with the surrounding wall; if it sits slightly proud, press it with your hand while driving the final screw.
Apply self-adhesive mesh tape over all four seams where the patch meets the existing wall, then proceed with joint compound exactly as described in Step 3, building up two to three thin coats and feathering widely for a smooth blend.
Test Paint Color Before Priming
Before you paint your repaired area, test a small patch of your existing wall paint on a piece of cardboard to check whether it still matches. Paint colors can shift over time due to fading. Having the paint color re-mixed at a hardware store using the original formula is often worth the small investment for a seamless match.
Finishing for a Seamless Result
The difference between a repair that blends in and one that stands out is almost entirely in the finishing. Joint compound shrinks slightly as it dries, so plan on at least two coats - three is common for larger patches. Each coat should be thinner and wider than the last, feathering the edges outward by a few inches to create a gradual transition.
Once the final coat is fully dry (the compound will turn uniformly white with no dark, wet spots), sand with 120-grit sandpaper and finish with 220-grit for a smooth surface. Wipe away all dust with a lightly damp cloth, let the wall dry, then apply a coat of drywall primer before painting. Skipping primer often results in a dull spot - called a flash - where the patched area absorbs paint differently from the surrounding wall.
If you are managing several repairs around the house as part of a broader project, see our guide to home improvement on a budget for practical advice on prioritizing repairs and sourcing materials cost-effectively.
Do Not Skip the Primer Step
Painting directly over bare joint compound - even when it looks smooth - almost always produces a visible dull spot once the paint dries. A coat of drywall primer seals the compound and creates a uniform surface that accepts topcoat paint evenly. This single step is the most commonly skipped and the most commonly regretted.