Why Caulk Fails Faster Than It Should
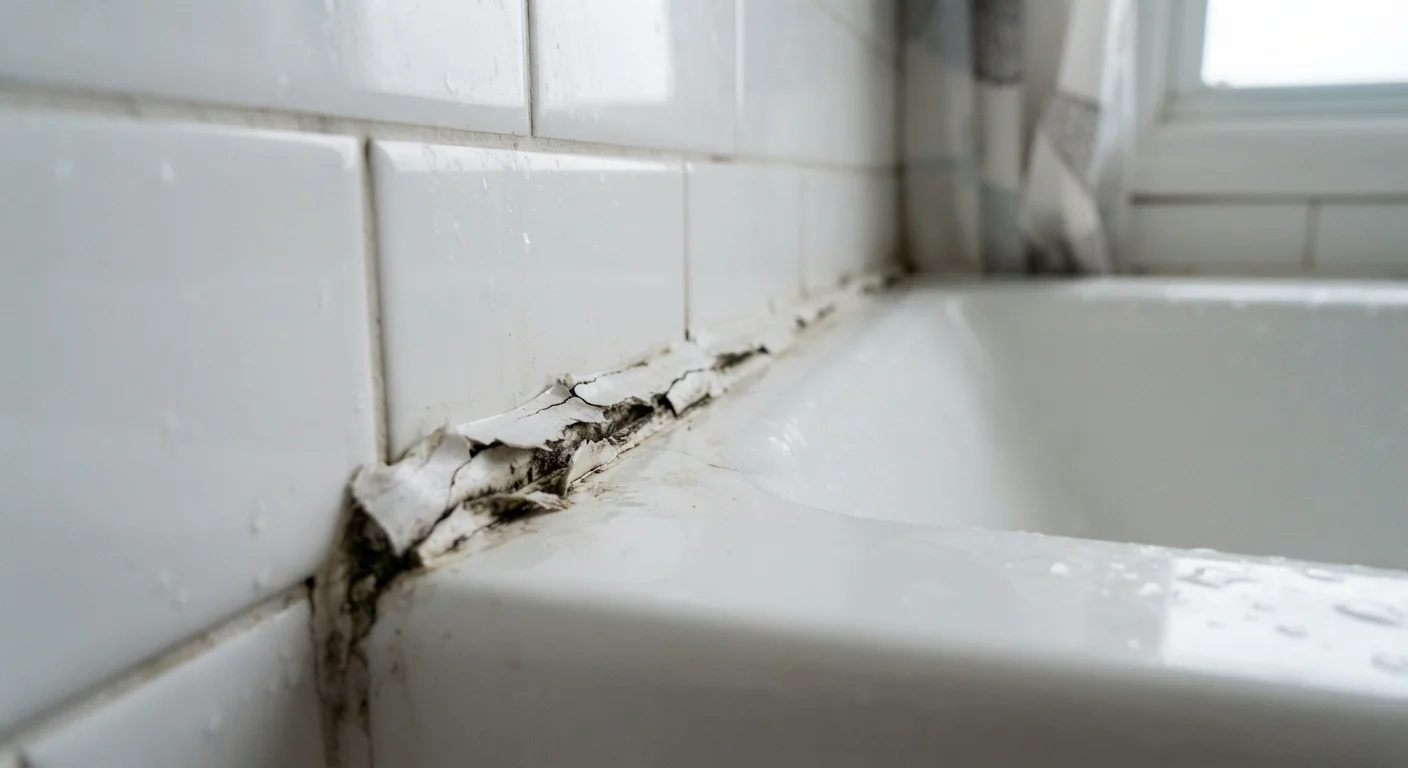
A fresh bead of caulk looks like a quick win. Thirty minutes of work, a clean line, problem solved - until six months later when it's cracking, peeling, or growing mold. The good news is that most caulk failures trace back to a handful of very avoidable mistakes made before or during application.
Understanding why caulk fails puts you firmly in control. Whether you're sealing a tub surround, a window frame, or a kitchen backsplash, the principles are the same. If you're planning a full tub re-seal, our guide to recaulking a bathtub walks through the complete process step by step.
Skipping removal of the old caulk and applying a new layer on top.
Why it happens: It looks like a shortcut that saves time, and the fresh caulk seems to adhere initially - masking the problem.
Caulking over a surface that isn't fully dry.
Why it happens: Many people clean the area and then immediately apply caulk, not realizing moisture trapped beneath breaks adhesion within weeks.
Using the wrong caulk type for the environment.
Why it happens: Grabbing whatever is available at the hardware store, or using leftover caulk from a previous project, without checking the label for suitability.
Applying caulk in cold or extremely humid conditions.
Why it happens: Homeowners often tackle caulking as a quick fix regardless of season or weather, unaware that temperature and humidity directly affect adhesion and cure.
Laying down a thick, uneven bead instead of a narrow, consistent one.
Why it happens: Thicker feels more substantial, and an unsteady hand or fast pace produces an inconsistent line that gets overcompensated with extra product.
Exposing freshly applied caulk to water before it has fully cured.
Why it happens: Impatience after a bathroom or kitchen caulking job leads to normal use resuming too quickly - often the same evening.
How to Set Yourself Up for a Seal That Lasts
Durable caulk work comes down to a short checklist followed carefully every time. Before you open the tube, confirm that all old caulk has been fully removed using a plastic scraper or an oscillating tool - residue left behind will break the bond from day one. Clean the surface with a bathroom cleaner or isopropyl alcohol, then let it dry completely. In humid spaces, this can take longer than you expect.
80%
Of caulk failures linked to poor surface prep
Home improvement professionals commonly attribute the majority of premature caulk failures to inadequate surface preparation rather than product quality.
24-48 hrs
Minimum cure time before water exposure
Most silicone caulk manufacturers specify at least 24 to 48 hours of cure time before the sealed area should contact water.
Choose a product labeled for your specific application. Silicone caulks excel in fully wet areas like tubs and showers because they stay flexible and resist mold. Latex or paintable acrylic caulks are better suited for trim, baseboards, and painted surfaces where you need to sand or topcoat. Never use an interior caulk in an exterior joint or vice versa.
Cut the tube nozzle at a shallow angle - about 45 degrees - and make the opening smaller than you think you need. Apply steady pressure at a consistent pace, holding the gun at a low angle. Once the bead is down, tool it immediately with a wet finger or a caulk finishing tool to compress it into the joint and eliminate air pockets. Then step away. Most caulks require at least 24 hours to cure before water contact; silicone products often need 48 hours or more. Consult the manufacturer's guidance on the specific product you choose.
Don't Rush the Cure - It Undoes All Your Work
Even caulk that feels dry to the touch on the surface may still be curing deeper in the bead. Exposing it to water, steam, or joint movement too early can cause it to lift or crack within days. Protect your work by keeping the area dry and undisturbed for the full cure period listed on the product label - and add extra time in cool or humid rooms.
With the right surface prep, the right product, and patience during cure time, caulk can realistically last many years rather than a few months. The investment of time upfront pays off every time.