Why Compost? The Short Version
Compost is partially decomposed organic matter - and when added to garden soil, it improves structure, supports beneficial microbial life, retains moisture, and slowly releases nutrients that plants can actually use. Unlike synthetic fertilizers, it works by building soil health over time rather than delivering a short burst of nutrients. It also diverts a meaningful share of household waste from the landfill. If you're planning a vegetable garden, see our first vegetable garden guide - compost is one of the most impactful investments you can make in your soil from the start.
The mechanics are simple: microorganisms (bacteria, fungi) break down organic material when given moisture, oxygen, and a balanced carbon-to-nitrogen ratio. Your job is to provide those conditions and stay patient.
What you will need
What You'll Need
Home composting doesn't require specialized equipment. A basic setup costs little to nothing, especially if you build a wire enclosure from materials you already have. Composting is one of the few genuinely budget-friendly home improvements that pays back in free, high-quality soil amendment every season.
Compost bin or wire mesh enclosure
Contains the composting material, retains heat, and keeps pests out.
Pitchfork or garden fork
Used to turn and aerate the pile so decomposition happens evenly.
Kitchen scrap container with lid
Collects food scraps on the countertop before transferring them to the outdoor bin.
Garden hose or watering can
Used to moisten the pile when it becomes too dry.
Compost thermometer
Measures internal pile temperature to confirm active decomposition is occurring.
Step-by-Step: Setting Up and Running Your Compost System
Follow these steps in order the first time you set up a compost system. Once the pile is established, steps 2-5 become an ongoing routine rather than a one-time task.
Choose and set up your composting method
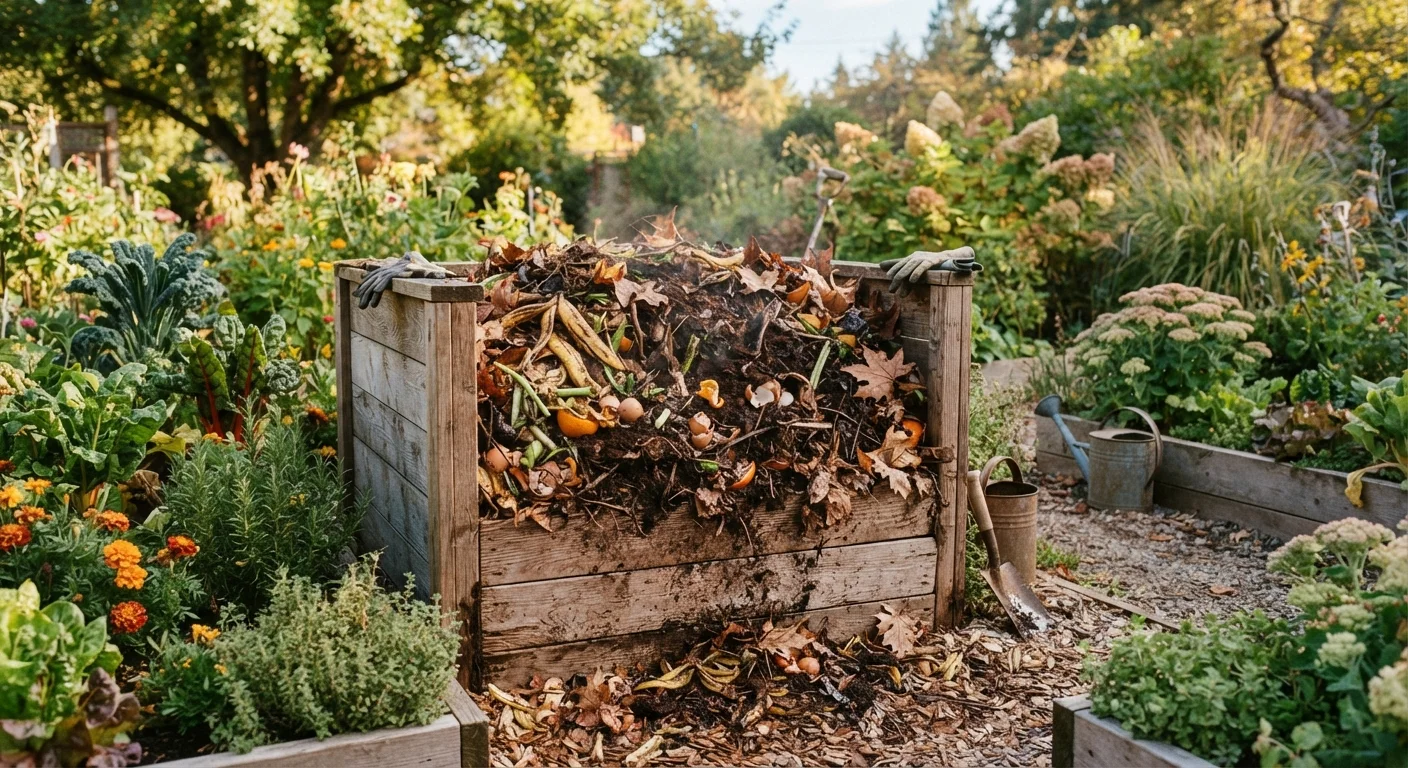
Select a spot that gets partial sun and has good drainage - avoid placing a pile directly against a fence or structure. You have two main options: a purchased plastic compost bin (which retains heat and deters pests) or a DIY wire mesh enclosure at least 3 feet square (which costs almost nothing and works well). Either approach is effective. Place the bin directly on soil so earthworms and beneficial microbes can migrate in from below.
Understand greens vs. browns
Successful composting relies on balancing two categories of material. Greens are nitrogen-rich: vegetable and fruit scraps, coffee grounds and filters, tea bags (paper only), fresh grass clippings, and plant trimmings. Browns are carbon-rich: dry leaves, cardboard torn into small pieces, newspaper, paper bags, and straw. A rough target ratio is about 2-3 parts browns to 1 part greens by volume. Too many greens creates a soggy, odorous pile; too many browns slows decomposition to a crawl.
Know what to leave out
Keep the following out of a standard backyard compost bin:
- Meat, fish, and poultry scraps
- Dairy products and eggs (shells are fine)
- Oily or heavily processed foods
- Pet waste (dogs, cats)
- Diseased plants or weeds that have gone to seed
- Glossy or colored paper
These materials either attract pests, introduce pathogens, or break down poorly in a home system. Eggshells, on the other hand, are welcome - they add calcium and help aerate the pile.
Build and layer your pile
Start with a 4-6 inch layer of coarse browns (wood chips, straw, or shredded cardboard) at the base to encourage airflow. Add a layer of greens on top, then another layer of browns. Continue layering as you generate material. Chop or shred scraps into smaller pieces before adding them - smaller surface area means faster decomposition. Aim to keep the pile roughly the size of a cubic yard (3 feet × 3 feet × 3 feet), which is large enough to generate internal heat.
Maintain moisture and aeration
The pile should feel about as moist as a wrung-out sponge - damp but not dripping. If it looks dry or decomposition stalls, water it lightly. If it smells like ammonia or rotten eggs, add more browns and turn it. Turn the pile with a pitchfork every 1-2 weeks, moving material from the edges toward the center. This introduces oxygen, which feeds the aerobic bacteria doing most of the work and dramatically shortens the time to finished compost.
Harvest and use your finished compost
Compost is ready when the original materials are unrecognizable and the pile looks, smells, and feels like dark, crumbly soil with an earthy aroma. This typically takes 2-6 months depending on your climate, pile size, and how often you turn it. To harvest, stop adding new material, let the pile rest for a few weeks, then scoop finished compost from the bottom or center. Spread 1-3 inches over garden beds and work it lightly into the top few inches of soil. See our spring garden prep guide for timing advice on working compost into beds before planting season.
Composting Is a Forgiving Process
There is no single perfect formula - even a neglected pile will eventually break down. If your compost isn't progressing as quickly as you'd like, check three things: moisture, aeration, and the green-to-brown ratio. Adjusting any one of these usually gets things moving again. Most beginner problems come from a pile that is too dry, too compacted, or overwhelmed with one material type.
Putting Compost to Work in Your Garden
Finished compost is one of the most versatile soil amendments available. Work 1-3 inches into vegetable beds each season, use it to top-dress established perennials, or mix it into potting soil for containers. It pairs especially well with mulch: apply compost first to feed the soil, then layer mulch on top to retain that moisture. Our guide to using mulch effectively walks through timing and material selection in detail.
If you've had trouble with plants not responding to fertilizer, it may be worth checking your soil pH before adding compost. Read more in our soil pH explainer - compost generally nudges pH toward neutral over time, which benefits most garden plants.
Don't Add Diseased or Invasive Plants
Home compost piles rarely reach temperatures high enough (above 140°F sustained) to reliably kill plant pathogens or weed seeds. Adding diseased plants or weeds that have gone to seed can spread problems throughout your garden when you apply finished compost. When in doubt, bag and discard those materials rather than composting them.